Mastering Manual Mode: A Step-by-Step Tutorial
10/30/20255 min read
Understanding Manual Mode and Its Benefits
Manual mode in photography is a setting that allows photographers to take complete control over their camera settings, enabling them to adjust shutter speed, aperture, and ISO according to their creative vision. Unlike automatic modes, which make decisions on these components automatically, manual mode empowers photographers to craft their images precisely as they envision them. This comprehensive understanding of the exposure triangle—shutter speed, aperture, and ISO—forms the backbone of effective manual shooting.
The shutter speed determines how long the camera's sensor is exposed to light. A fast shutter speed freezes motion, making it ideal for action shots, while a slower speed can introduce motion blur, thereby lending a sense of movement to an image. Aperture, on the other hand, controls the depth of field, influencing what parts of an image appear sharp or blurred. A wider aperture allows more light into the camera and creates a shallow depth of field, which can beautifully isolate subjects from the background. Finally, ISO measures the camera sensor's sensitivity to light, impacting the overall brightness of a photograph. Adjusting the ISO enables photographers to capture images in varying lighting conditions without compromising quality.
One of the significant benefits of mastering manual mode lies in the creative freedom it brings. Photographers can make nuanced artistic choices, such as achieving specific visual effects or adapting to challenging lighting situations, which may not be possible with automatic settings. This level of control over exposure settings can be particularly advantageous in unpredictable conditions, such as during sunset or in low light scenarios. Ultimately, understanding and utilizing manual mode not only elevates a photographer's skill set but also enhances their ability to capture compelling imagery that truly reflects their unique perspective.
The Exposure Triangle: A Closer Look
The exposure triangle is a fundamental concept in photography that consists of three key elements: shutter speed, aperture, and ISO. Understanding how these components interact with one another can significantly enhance a photographer’s ability to control exposure and achieve desired results.
Shutter speed refers to the length of time the camera's shutter remains open to allow light to hit the sensor. It is measured in seconds or fractions of a second. For instance, a shutter speed of 1/2000 seconds captures fast-moving subjects, freezing motion effectively, while a longer shutter speed, such as 1 second or more, is useful for capturing motion blur, which can convey a sense of movement in a scene.
Aperture, represented by f-stop numbers, indicates the size of the lens opening. A lower f-number (e.g., f/2.8) corresponds to a larger aperture, allowing more light to enter and creating a shallow depth of field, which can artistically blur the background. Conversely, a higher f-number (e.g., f/16) results in a smaller aperture, maximizing depth of field and keeping more of the image in focus, which is often desired in landscape photography.
ISO measures the sensitivity of the camera’s sensor to light. A lower ISO (e.g., ISO 100) is ideal for bright conditions, yielding clearer, noise-free images. Higher ISO settings (e.g., ISO 1600 or above) enable photography in low-light situations but can introduce noise, affecting image quality. It’s vital to balance these interdependent components: if you increase one, adjustments to the others may be necessary to maintain proper exposure.
For example, if you decide to use a faster shutter speed to freeze action, you might need to widen the aperture or increase the ISO to compensate for the reduced light hitting the sensor. Conversely, if you want a greater depth of field, you would select a smaller aperture, but may need to adjust the shutter speed or ISO accordingly to achieve an adequately exposed image. Understanding and manipulating these elements effectively allows photographers to create stunning visuals that embody their artistic vision.
Step-by-Step Guide to Setting Up Your Camera in Manual Mode
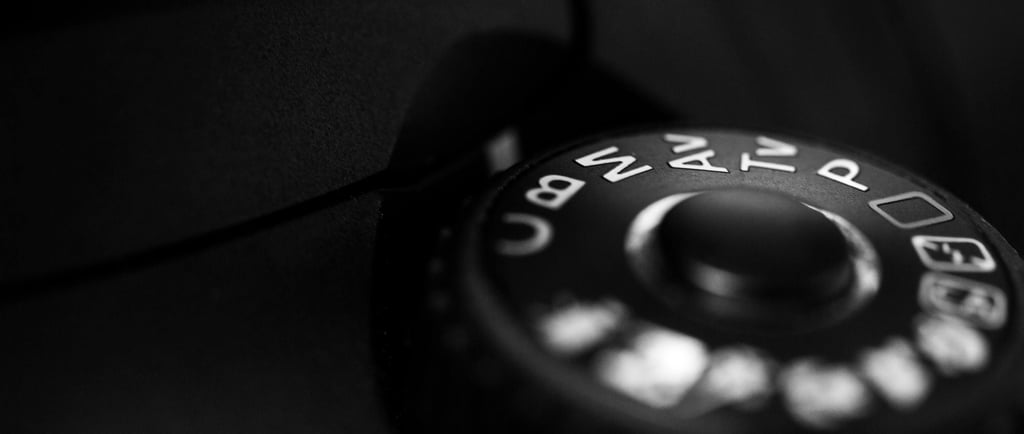
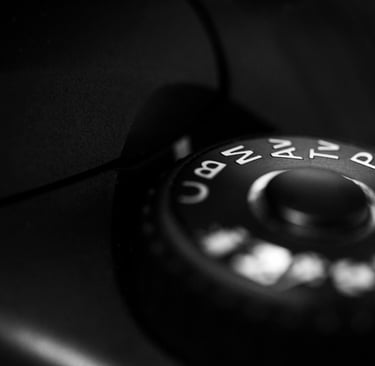
Setting up your camera in manual mode is an empowering step that allows photographers to take full control over the settings that affect their images. To begin, ensure that your camera is turned on, and consult the user manual to identify how to access manual mode. Most cameras will have a mode dial on the top or back of the device, which you can rotate to the “M” position for manual settings. If your camera model doesn’t have a mode dial, check its menu system for the manual mode option.
Before embarking on your shooting journey, it is essential to perform some pre-shooting checks. Start by examining the battery level; a depleted battery could mean missing out on capturing great shots. Also, check your lens settings, ensuring that the lens is set to autofocus or manual focus as per your requirements. Moreover, examine the exposure meter, which helps in determining if the image is properly exposed. Familiarize yourself with the histogram feature if your camera has one, as it is a valuable tool for assessing exposure.
Once you have set your camera to manual mode and completed your pre-shooting checks, you can begin adjusting the three critical components that influence exposure: shutter speed, aperture, and ISO. The shutter speed controls how long the camera’s sensor is exposed to light. A faster shutter speed can freeze fast-moving subjects while a slower speed will create motion blur. Aperture determines how much light enters the lens and affects depth of field; wider apertures (lower f-stop numbers) create a blurred background, while narrower apertures (higher f-stop numbers) keep more of the scene in focus. Lastly, ISO adjusts the sensor's sensitivity to light; higher ISO settings allow for shooting in lower light but can introduce noise. With practice, mastering the balance between these three elements will enhance your photography skills significantly.
Practical Tips for Practicing Manual Photography
Practicing manual photography can seem daunting, but several effective tips can help you master this art form. First and foremost, choose the right shooting conditions. Opt for a time of day when natural light is plentiful, such as during the golden hour—just after sunrise or before sunset. This soft, diffused light can produce stunning photographs while minimizing the challenges that come with harsh lighting conditions. Non-ideal weather conditions can also serve as an interesting backdrop, allowing you to explore how to adjust your settings creatively.
Next, consider the types of subjects you focus on. Start with stationary objects, such as still life setups or landscapes, which will enable you to refine your settings without the pressure of rapidly changing elements. Gradually progress to capturing dynamic subjects like moving animals or people. This will compel you to adapt your settings quickly, aiding your overall proficiency in manual photography.
After each photo session, take the time to analyze your results critically. Assess your photographs in terms of exposure, focus, and composition. Identifying what worked well and what didn’t will foster continuous improvement. As you gain more experience, keep a journal documenting your observations and insights, allowing you to track your growth over time.
Common challenges include overexposure, underexposure, and focus issues. To combat these, remember that experimentation is key. Use valuable tools like histograms and highlight warnings, which can help you understand exposure levels better. At the same time, embrace the learning curve; every photographer encounters obstacles in their journey. Finally, trust your instincts and develop a personal shooting style through experimentation. The more you practice, the more you’ll discover your unique perspective. This discovery process is essential in transitioning from novice to adept in manual photography.